Setup Maester in Azure Automation
This guide will walk you through setting up Maester in Azure Automation and automate the running of tests using Runbooks.
Why Azure Automation?
Azure Automation provides a simple and effective method to automate email reporting with Maester. Azure Automation has a free-tier option, giving you up to 500 minutes of execution each month without additional cost.
Pre-requisites
- If this is your first time using Microsoft Azure, you must set up an Azure Subscription so you can create resources and are billed appropriately.
- You must also have the Global Administrator role in your Entra tenant. This is so the necessary permissions can be consented to the Managed Identity.
Create an Azure Automation Account
- Browse to the Azure portal and open the Automation Accounts blade.
- Select + Create.
- Select a Subscription and Resource Group.
- Enter a name for the account (e.g.
Maester-Automation-Account) and select a region.
- Select Next.
- Leave System assigned selected.
- Select Review + Create.
- Click Create.
Assign permissions to the System-assigned Managed Identity
The script below will assign the required Graph permissions to the managed identity created in the previous step.
Copy and paste the script below to run it in your local PowerShell environment.
If required, make the following changes to the script before running it:
- Replace the
$managedIdentityNamevariable with the name of the Automation Account you created in the previous step. - Uncomment the -SendMail switch in the Get-MtGraphScope line, if the automation needs to email the Maester report.
- Uncomment the -Privileged switch in the Get-MtGraphScope line, if the automation needs to run some of the tests that require privileged permission scopes.
$managedIdentityName = "Maester-Automation-Account" #Name of the Automation Account created in the previous step

Connect-MgGraph -Scopes Application.Read.All, AppRoleAssignment.ReadWrite.All

$permissions = Get-MtGraphScope #-SendMail -Privileged

$managedIdentity = (Get-MgServicePrincipal -Filter "DisplayName eq '$managedIdentityName'")
$managedIdentityId = $managedIdentity.Id
$getPerms = (Get-MgServicePrincipal -Filter "AppId eq '00000003-0000-0000-c000-000000000000'").AppRoles | Where {$_.Value -in $permissions}
$graphAppId = (Get-MgServicePrincipal -Filter "AppId eq '00000003-0000-0000-c000-000000000000'").Id

foreach ($perm in $getPerms){
    New-MgServicePrincipalAppRoleAssignment -ServicePrincipalId $managedIdentityId `
    -PrincipalId $managedIdentityId -ResourceId $graphAppId -AppRoleId $perm.id
}
Load the required PowerShell modules
- Open Automation Accounts blade.
- Select the Automation Account you created earlier.
- Select Runtime Environments.
- Select Create.
- Define a name for the environment.
- Select PowerShell for the language and set the Runtime version to 7.4.
- Select Next.
- On the Packages tab, select Add from gallery and select the following packages:
- Maester
- Microsoft.Graph.Authentication
- Pester
- NuGet
- PackageManagement
- Select Next.
- Select Create.
Create a new Runbook
-
Under Process Automation Select Runbooks
-
Select Create to Runbook.
-
Define a name for the Runbook.
-
Next to Runbook type, select PowerShell, then choose the Runtime Environment you previously created.
-
Select Review + Create.
-
Click Create.
-
Copy and paste this example code:
- If you need to send an email, make sure to replace the value of the variable
MailRecipient.
- If you need to send an email, make sure to replace the value of the variable
Connect-MgGraph -Identity

#Define mail recipient
$MailRecipient = "Define Sender/Recipient"

#create output folder
$date = (Get-Date).ToString("yyyyMMdd-HHmm")
$FileName = "MaesterReport" + $Date + ".zip"

$TempOutputFolder = $env:TEMP + $date
if (!(Test-Path $TempOutputFolder -PathType Container)) {
    New-Item -ItemType Directory -Force -Path $TempOutputFolder
}

#Run Maester report
cd $env:TEMP
md maester-tests
cd maester-tests
Install-MaesterTests .\tests
Invoke-Maester -MailUserId $MailRecipient -MailRecipient $MailRecipient -OutputFolder $TempOutputFolder
- Click Save, then Publish.
Create a schedule
- From the Azure Portal, open your Automation Account.
- Under Shared Resources select Schedules.
- Click Add a schedule and define a name.
- Set the Recurrence to Recurring.
- Select Recur every 1 Month and set Run on last day of month to Yes.
- Click Create.
- Under Process Automation, select Runbooks and open your Runbook.
- Click Schedules > Add a schedule.
- Choose your schedule and click OK.
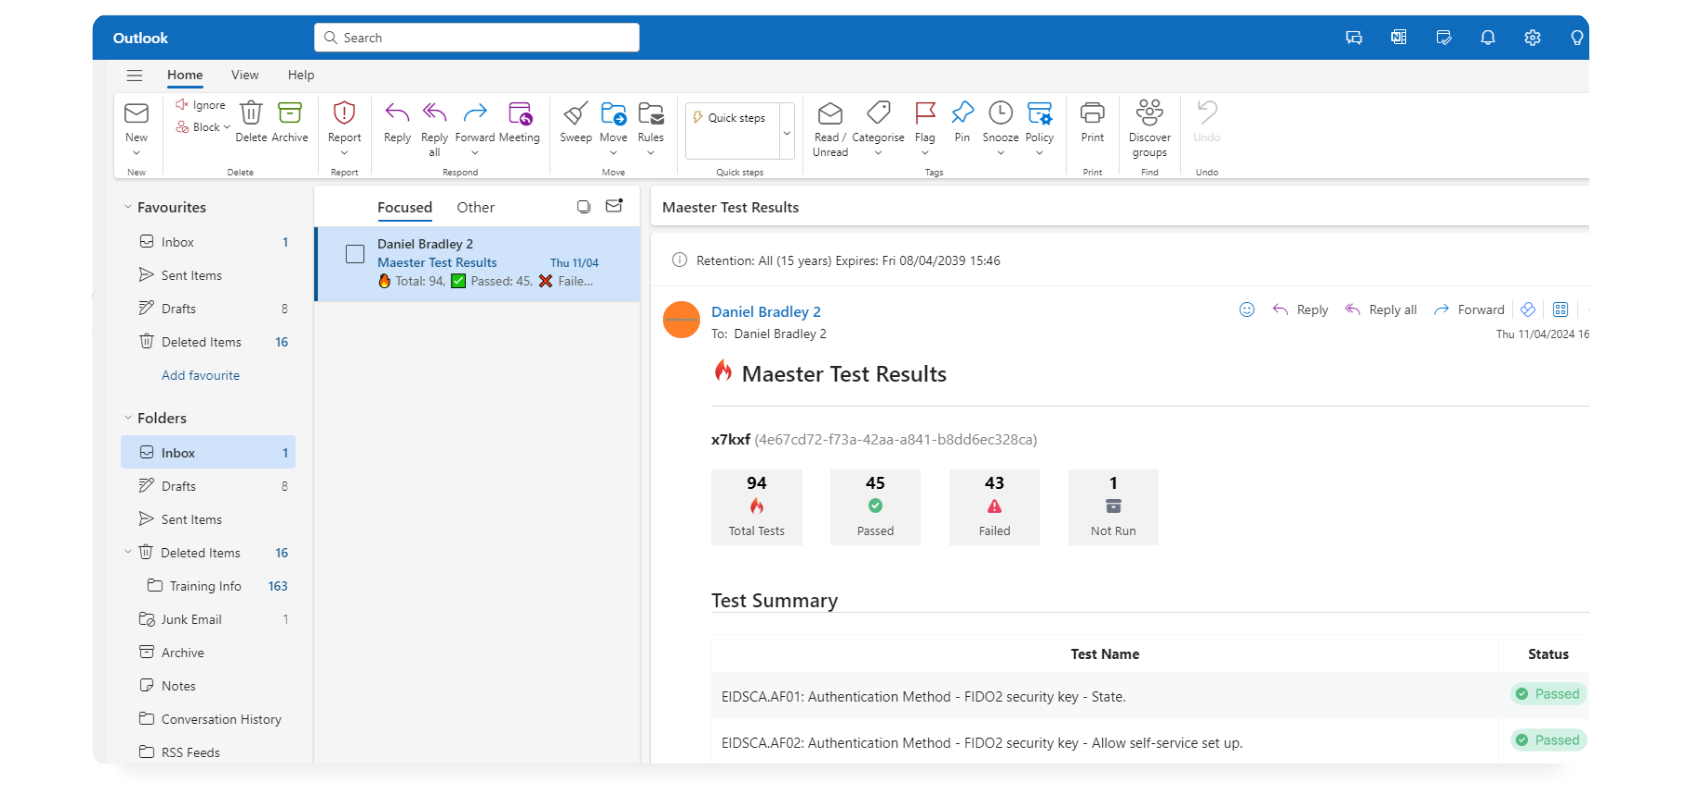
Viewing the test results
FAQ / Troubleshooting
- You see a
The term 'Get-MgServicePrincipal' is not recognizederror message- You don't have Graph PowerShell installed, you can install it by running
Install-Module Microsoft.Graph.Applications.
- You don't have Graph PowerShell installed, you can install it by running
- You have more than one managed identity with the same name
- Search for the managed identity in Enterprise Applications (Remove the Application type == Enterprise Applications filter)
- Copy the Object ID and set the
$managedIdentityIdvariable in the script above (eg$managedIdentityId = 'insert-object-id').
Contributors
- Original author: Daniel Bradley | Microsoft MVP