Set up Maester in BitBucket
This guide will walk you through setting up Maester in BitBucket and automate the running of tests using BitBucket Pipelines.
Set up your Maester tests repository in BitBucket
Pre-requisites
- If you are new to BitBucket, create an account at BitBucket.com for organizations
- If you use BitBucket.com, you can run your CI/CD pipelines workflows on BitBucket-hosted runners.
Create a blank new project to always use the latest available public Maester Tests
- On the top bar, at the top, select 'Create ' and select 'Repository' from the dropdown.

-
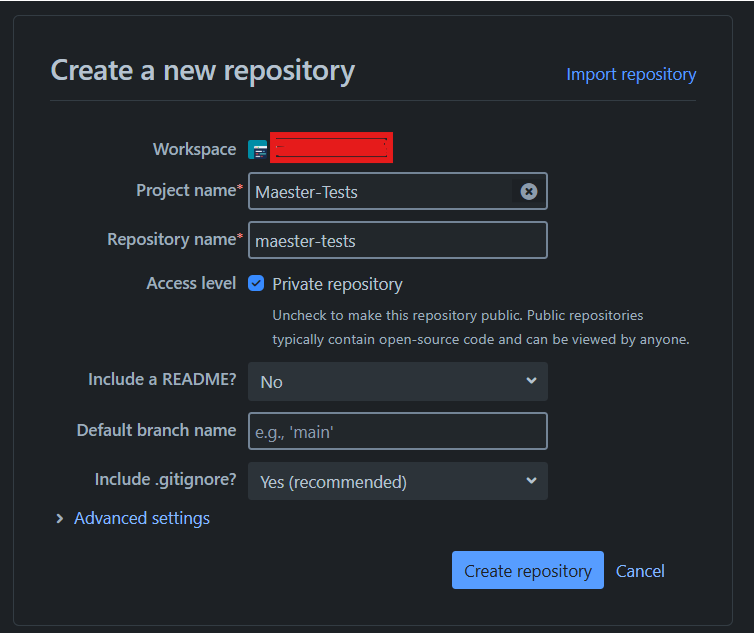
Create a New Repository Create a repository
- Project: Choose an existing project or create a new one.
- Repository name: Give your repository a descriptive name (e.g., maester-tests).
- Select the checkbox Access Level: Private Repository
-
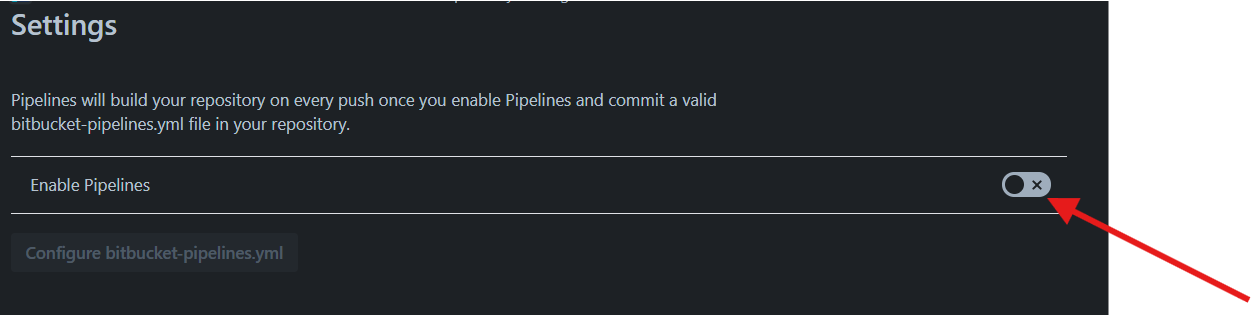
Once the repository is created, navigate to the Repository settings --> Settings in left navigation bar. From Settings toggle Enable Pipelines.
-
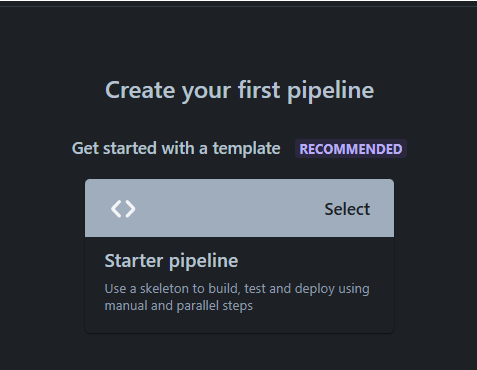
Click on the Configure bitbucket-pipelines.yml. and Click on the Starter Pipeline to create a pipeline. This will add the
bitbuckets-pipelines.ymlfile for Bitbucket CI/CD Pipeline. We need to edit the initial code for running public Maester tests.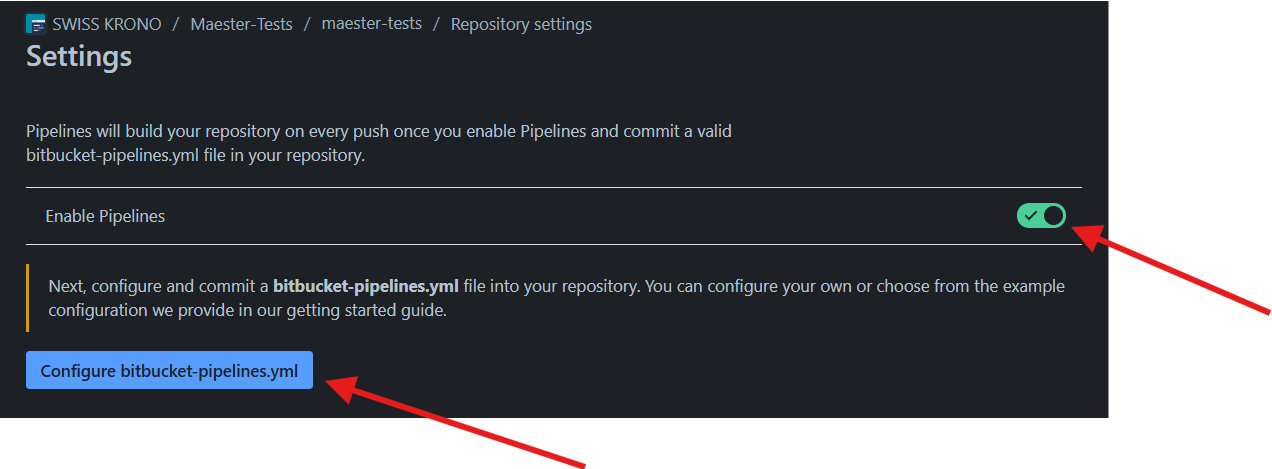
There are many ways to authenticate with Microsoft Entra. We currently have tested client secrets, but there are probably more options available.
- Client secret uses a secret to authenticate with Microsoft Entra protected resources.
- Custom workflow using client secret
Create an Entra Application
- Open Entra admin center > Identity > Applications > App registrations
- Tip: enappreg.cmd.ms is a shortcut to the App registrations page.
- Select New registration
- Enter a name for the application (e.g.
Maester DevOps Account) - Select Register
Grant permissions to Microsoft Graph
- Open the application you created in the previous step
- Select API permissions > Add a permission
- Select Microsoft Graph > Application permissions
- Search for each of the permissions and check the box next to each permission:
- DeviceManagementConfiguration.Read.All
- DeviceManagementManagedDevices.Read.All
- DeviceManagementRBAC.Read.All
- DeviceManagementServiceConfig.Read.All
- Directory.Read.All
- DirectoryRecommendations.Read.All
- IdentityRiskEvent.Read.All
- OnPremDirectorySynchronization.Read.All
- Policy.Read.All
- Policy.Read.ConditionalAccess
- PrivilegedAccess.Read.AzureAD
- Reports.Read.All
- ReportSettings.Read.All
- RoleEligibilitySchedule.Read.Directory
- RoleManagement.Read.All
- SecurityIdentitiesSensors.Read.All
- SecurityIdentitiesHealth.Read.All
- SharePointTenantSettings.Read.All
- ThreatHunting.Read.All
- UserAuthenticationMethod.Read.All
- Optionally, search for each of the permissions if you want to allow privileged permissions:
- ReportSettings.ReadWrite.All
- Required to disable report obfuscation
- ReportSettings.ReadWrite.All
- Select Add permissions
- Select Grant admin consent for [your organization]
- Select Yes to confirm
(Optional) Grant permissions to Exchange Online
(Optional) Grant permissions to Exchange Online
The Exchange Online Role Based Access Control (RBAC) implementation utilizes service specific roles that apply to an application and the below configuration allows the authorization chain to the App Registration you created in the previous steps.
The Exchange Online permissions are necessary to support tests that validate Exchange Online configurations, such as the CISA tests.
- Open the application you created in the previous step
- Select API permissions > Add a permission
- Select APIs that my organization uses > search for Office 365 Exchange Online > Application permissions
- Search for
Exchange.ManageAsApp - Select Add permissions
- Select Grant admin consent for [your organization]
- Select Yes to confirm
- Connect to the Exchange Online Management tools and use the following to set the appropriate permissions:
New-ServicePrincipal -AppId <Application ID> -ObjectId <Object ID> -DisplayName <Name>
New-ManagementRoleAssignment -Role "View-Only Configuration" -App <DisplayName from previous command>
(Optional) Grant permissions to Teams
(Optional) Grant permissions to Teams
The Teams Role Based Access Control (RBAC) implementation utilizes service specific roles that apply to an application and the below configuration allows the authorization chain to the App Registration you created in the previous steps.
The Teams permissions are necessary to support tests that validate Teams configurations.
- Open Roles and administrators
- Search and select Teams Reader
- Select Add assigment
- Select No member selected
- Search for the name of previously created application
- Select previously created application and select Select to confirm
- Select Next to confirm
- Ensure that Active and Permanently assigned are ticked
- Enter Justification
- Select Assign to confirm
(Optional) Grant permissions to Azure
(Optional) Grant permissions to Azure
The Azure Role Based Access Control (RBAC) implementation utilizes Uniform Resource Names (URN) with a "/" separator for heirarchical scoping. There exists resources within the root (e.g., "/") scope that Microsoft retains strict control over by limiting supported interactions. As a Global Administrator you can elevate access to become authorized for these limited interactions.
The Azure RBAC permissions are necessary to support tests that validate Azure configurations, such as the CISA tests.
The following PowerShell script will enable you, with a Global Administrator role assignment, to:
- Identify the Service Principal Object ID that will be authorized as a Reader (Enterprise app Object ID)
- Install the necessary Az module and prompt for connection
- Elevate your account access to the root scope
- Create a role assignment for Reader access over the Root Scope
- Create a role assignment for Reader access over the Entra ID (i.e., aadiam provider)
- Identify the role assignment authorizing your account access to the root scope
- Delete the root scope role assignment for your account
$servicePrincipal = "<Object ID of the Entra App>"
$subscription = "<Subscription ID>"
Install-Module Az.Accounts -Force
Install-Module Az.Resources -Force
Connect-AzAccount
#Elevate to root scope access
$elevateAccess = Invoke-AzRestMethod -Path "/providers/Microsoft.Authorization/elevateAccess?api-version=2015-07-01" -Method POST

#Assign permissions to Enterprise App
New-AzRoleAssignment -ObjectId $servicePrincipal -Scope "/" -RoleDefinitionName "Reader" -ObjectType "ServicePrincipal"
New-AzRoleAssignment -ObjectId $servicePrincipal -Scope "/providers/Microsoft.aadiam" -RoleDefinitionName "Reader" -ObjectType "ServicePrincipal"

#Remove root scope access
$assignment = Get-AzRoleAssignment -RoleDefinitionId 18d7d88d-d35e-4fb5-a5c3-7773c20a72d9|?{$_.Scope -eq "/" -and $_.SignInName -eq (Get-AzContext).Account.Id}
$deleteAssignment = Invoke-AzRestMethod -Path "$($assignment.RoleAssignmentId)?api-version=2018-07-01" -Method DELETE
(Optional) Grant Dataverse permissions for Copilot Studio tests
(Optional) Grant Dataverse permissions for Copilot Studio
Dataverse access is required for the Copilot Studio security tests (MT.1113–MT.1122) that evaluate Copilot Studio agent configurations.
Create an Application User in Power Platform
- Go to the Power Platform Admin Center → select your environment → Settings → Users + permissions → Application users
- Click New app user → Add an app → select the app registration created above
- Select the correct Business unit
- Assign a security role with read access:
- Basic User for simplicity, or
- A custom role (e.g.
Maester Security Reader) with Organization-level Read on: Agent (bot), Agent component (botcomponent), User (systemuser), and Connection Reference (connectionreference)
- Click Create
Configure Maester
Add the environment URL to maester-config.json:
{
  "GlobalSettings": {
    "DataverseEnvironmentUrl": "https://org12345.crm.dynamics.com"
  }
}
Create a client secret
- Select Certificates & secrets > Client secrets > New client secret
- Enter a description for the secret (e.g.
Maester DevOps Secret) - Select Add
- Copy the value of the secret, we will use this value in the Azure Pipeline
Create Bitbucket repository variables
- Open your
maester-testsBitbucket repository and go to Repository settings. - Select Pipelines > Repository variables.
- Add the three secrets listed below. Make sure to check the checkbox (
[x]) for each variable.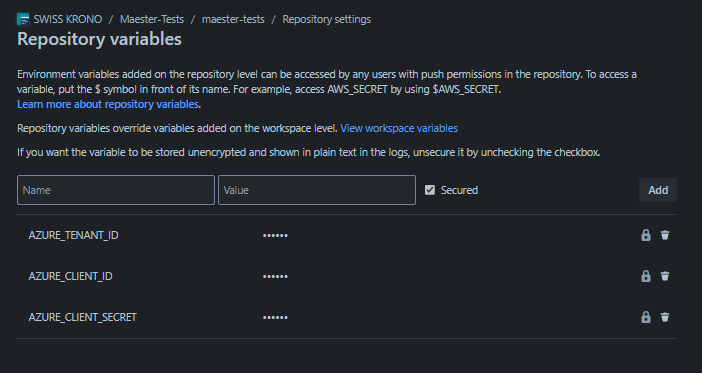
- To look up these values you will need to use the Entra portal, open the application you created earlier and copy the following values from the Overview page:
- Visibility: Visible, Key: AZURE_TENANT_ID, Value: The Directory (tenant) ID of the Entra tenant
- Visibility: Visible, Key: AZURE_CLIENT_ID, Value: The Application (client) ID of the Entra application you created
- Visibility: Masked and hidden, Key: AZURE_CLIENT_SECRET, Value: The client secret you copied in the previous step
- Save each secret by selecting Add variable at the bottom.
Edit bitbucket-pipelines.yml file (using the pipeline editor or IDE)
# Global options
options:
  max-time: 120 # 2 hours max runtime for all pipelines

# Git clone behavior
clone:
  depth: 1 # Shallow clone for faster checkout

# Cache and service container definitions
definitions:
  caches:
    powershell: ~/.powershell

# Docker image options (global)
image: mcr.microsoft.com/microsoftgraph/powershell:latest

# Pipeline configuration
pipelines:
  custom:
    run-maester-tests:
      - stage:
          name: Maester Testing Stage
          # Step configuration
          steps:
            - step:
                name: Run Maester Tests
                size: 2x # Standard size
                caches:
                  - powershell
                script:
                  - mkdir test-results
                  - mkdir public-tests
                  - pwsh -c 'Write-host "Running in project $BITBUCKET_REPO_SLUG with results at $BITBUCKET_BUILD_NUMBER."'
                  - |
                    pwsh -Command '
                      # Connect to Microsoft Graph - Access environment variables correctly
                      $clientSecret = ConvertTo-SecureString -AsPlainText "$env:AZURE_CLIENT_SECRET" -Force
                      [pscredential] $clientSecretCredential = New-Object System.Management.Automation.PSCredential("$env:AZURE_CLIENT_ID", $clientSecret)
                      Connect-MgGraph -TenantId "$env:AZURE_TENANT_ID" -ClientSecretCredential $clientSecretCredential -NoWelcome

                      # Install Maester
                      Install-Module Maester -Force

                      # Latest public tests
                      cd public-tests
                      Install-MaesterTests
                      cd ..

                      # Configure test results
                      $PesterConfiguration = New-PesterConfiguration
                      $PesterConfiguration.Output.Verbosity = "None"
                      Write-Host "Pester verbosity level set to: $($PesterConfiguration.Output.Verbosity.Value)"

                      $MaesterParameters = @{
                        Path                 = "public-tests"
                        PesterConfiguration  = $PesterConfiguration
                        OutputFolder         = "test-results"
                        OutputFolderFileName = "test-results"
                        PassThru             = $true
                        NonInteractive       = $true
                      }

                      # Add DisableTelemetry parameter
                      $MaesterParameters.Add("DisableTelemetry", $true)
                      Write-Host "Pester telemetry set to: $($MaesterParameters.DisableTelemetry)"

                      # Run Maester tests
                      $results = Invoke-Maester @MaesterParameters

                      # View summary report
                      $results | Format-List Result, FailedCount, PassedCount, SkippedCount, TotalCount, TenantId, TenantName, CurrentVersion, LatestVersion

                      # Flag status to Bitbucket
                      if ($results.Result -ne "Passed") {
                        Write-Warning "Status = $($results.Result): see Maester Test Report for details."
                        exit 1
                      }
                    '
                after-script:
                  - pwsh -c 'Write-host "Report can be opened in artifacts - test-results/test-results.html."'
                artifacts:
                  - test-results/**
Manually running the Maester tests
To manually run the Maester tests workflow
- Open your
maester-testsBitBucket repository. - Select Piplines from the left pane
- Click Run pipeline on the top right pane.
- Select the branch you want to run the pipeline on (e.g., main) , select the Pipeline
custom:run-maester-testsand click Run.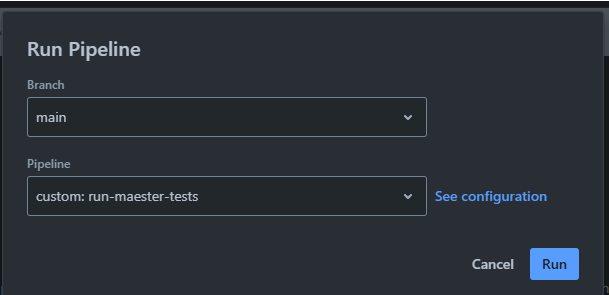
- This will trigger the pipeline.

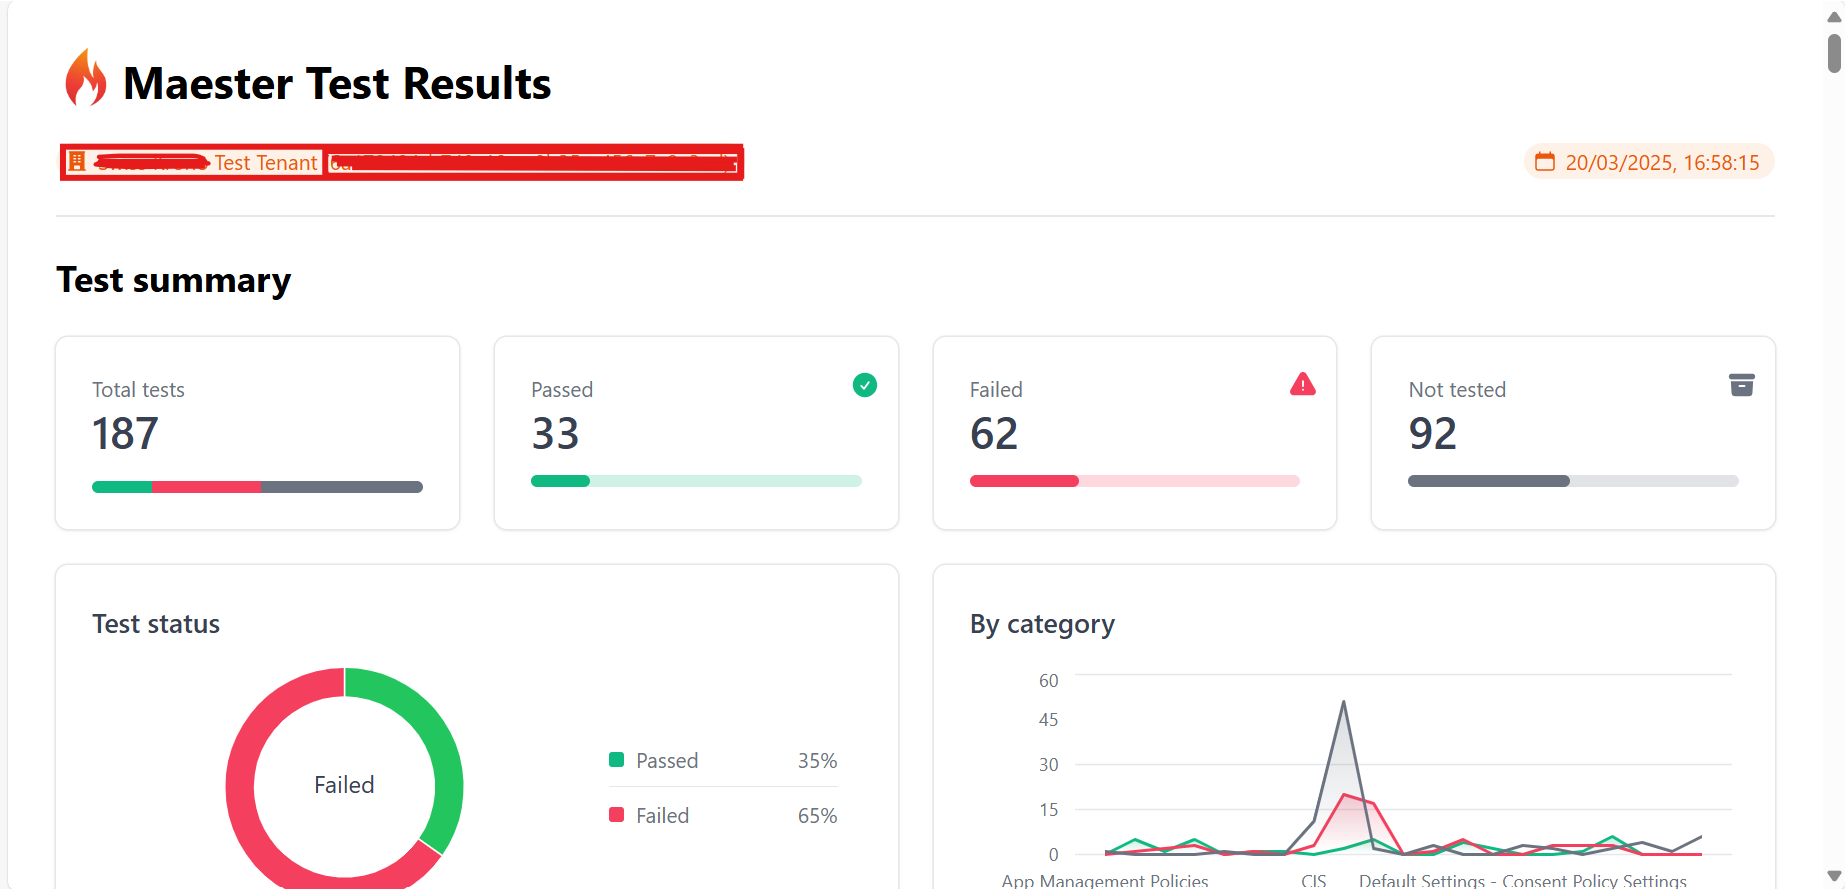
Viewing the test results
- Open your maester-tests Bitbucket repository and go to Pipelines.
- Click on the latest pipeline run to inspect. Click on the Run Maester Tests step and select the artifacts tab on right.
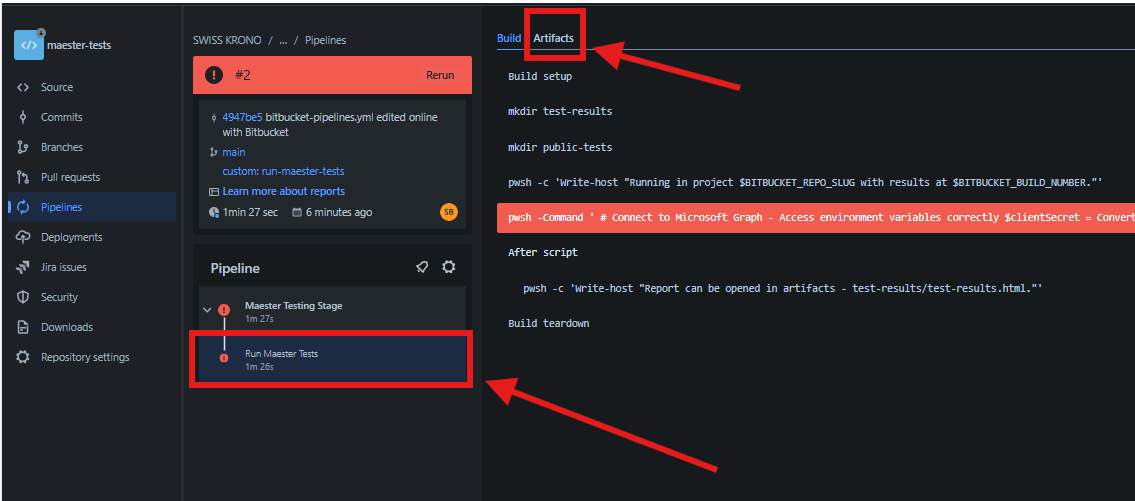
- Click on the download icon to download the test results artifacts.

- Open the folder
test-resultsfrom the downloaded artifact to view the test results.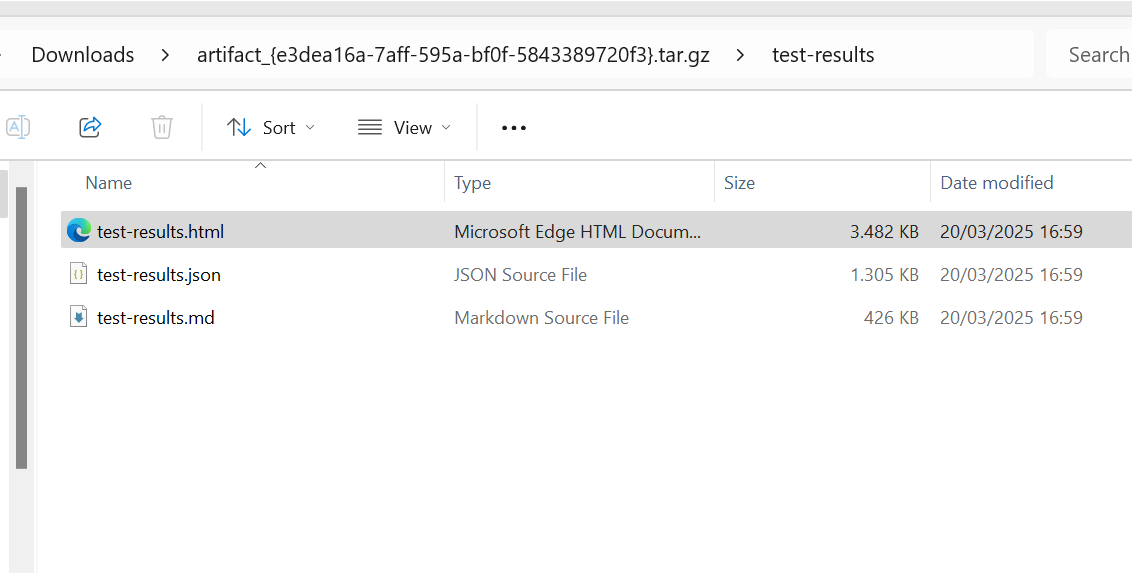
- Click on the
test-results.htmlpage to view the test result in your browser.
Schedule the Pipeline
- Go to the
Maester-Testsrepository in Bitbucket. - Click Pipelines then Schedules (at the top right), and then click New schedule.
- Choose the Branch (e.g. main) and Pipeline
custom:run-maester-tests: - Select how often you would like the pipeline to run (e.g. weekly).
FAQ / Troubleshooting
- Ensure you are monitoring your BitBucket Runner cost.