Set up Maester in Azure DevOps
This guide will walk you through setting up Maester in Azure DevOps and automate the running of tests using Azure DevOps Pipelines.
Why Azure DevOps & Terraform?
Azure DevOps is a great way to automate the daily running of Maester tests to monitor your tenant. You can use Azure DevOps to run Maester tests on a schedule, such as daily, and view the results in the Azure DevOps interface.
Azure DevOps comes with a free tier that includes 1,800 minutes of Maester test runs per month (unlimited hours if you use a self-hosted agent).
Azure DevOps has native integration with Microsoft Entra including single sign on, user and group management as well as support for conditional access policies.
Terraform is an open-source Infrastructure as Code (IaC) tool used to configure and deploy infrastructure across platforms like AWS, GCP, and Azure. We've created a Terraform module to simplify and streamline the deployment of Maester to Azure DevOps.
Pre-requisites
- If this is your first time using Azure DevOps, you will first need to create an organization.
- Azure DevOps - Create an organization
tip
To enable the free tier, to use a Microsoft-hosted agent, for Azure Pipelines you will need to submit this form https://aka.ms/azpipelines-parallelism-request (it can take a few days before you can use the pipeline.) In the interim you can use a self-hosted agent to get started.
- Azure DevOps - Create an organization
- You must have the Global Administrator role in your Entra tenant. This is so the necessary permissions can be consented to the Managed Identity.
- You must have the permissions to create a temporary PAT (Personal Access Token) with Full Access in Azure DevOps to deploy the necessary Azure DevOps resources.
- You can safely delete the PAT after deployment.
- You must also have Terraform & Azure CLI installed on your machine:
Terraform Module Deployment
Now it's time to deploy the Maester Terraform module! 🔥 First, add the temporary Personal Access Token (PAT) to your environment variables.
export AZDO_PERSONAL_ACCESS_TOKEN=<pat>export AZDO_ORG_SERVICE_URL=https://dev.azure.com/<devOpsOrganizationName>
You can then easily use the Terraform module by creating a main.tf file with the following content.
- Make sure to update the required variables based on your environment information.
module "maester" {
  source  = "maester365/maester/azuredevops"
  version = "1.0.0"
  azure_tenant_id = "tenantId"
  azure_subscription_id = "subscriptionId"
  azure_subscription_name = "subscriptionName"
  azure_devops_org_name  = "devOpsOrganizationName"
}
Initialize the Configuration:
terraform init -upgrade
Plan and Apply:
terraform plan -out main.tfplanterraform apply main.tfplan
Grab a coffee and come back in a few minutes to check the resources. ☕️
Viewing codebase
- Select Repos > Files and switch to Maester-tests repository
Viewing test results
- Select Pipelines > Runs to view the status of the pipeline
- Select on a run to view the test results
Summary view
The summary view shows the status of the pipeline run, the duration, and the number of tests that passed, failed, and were skipped.
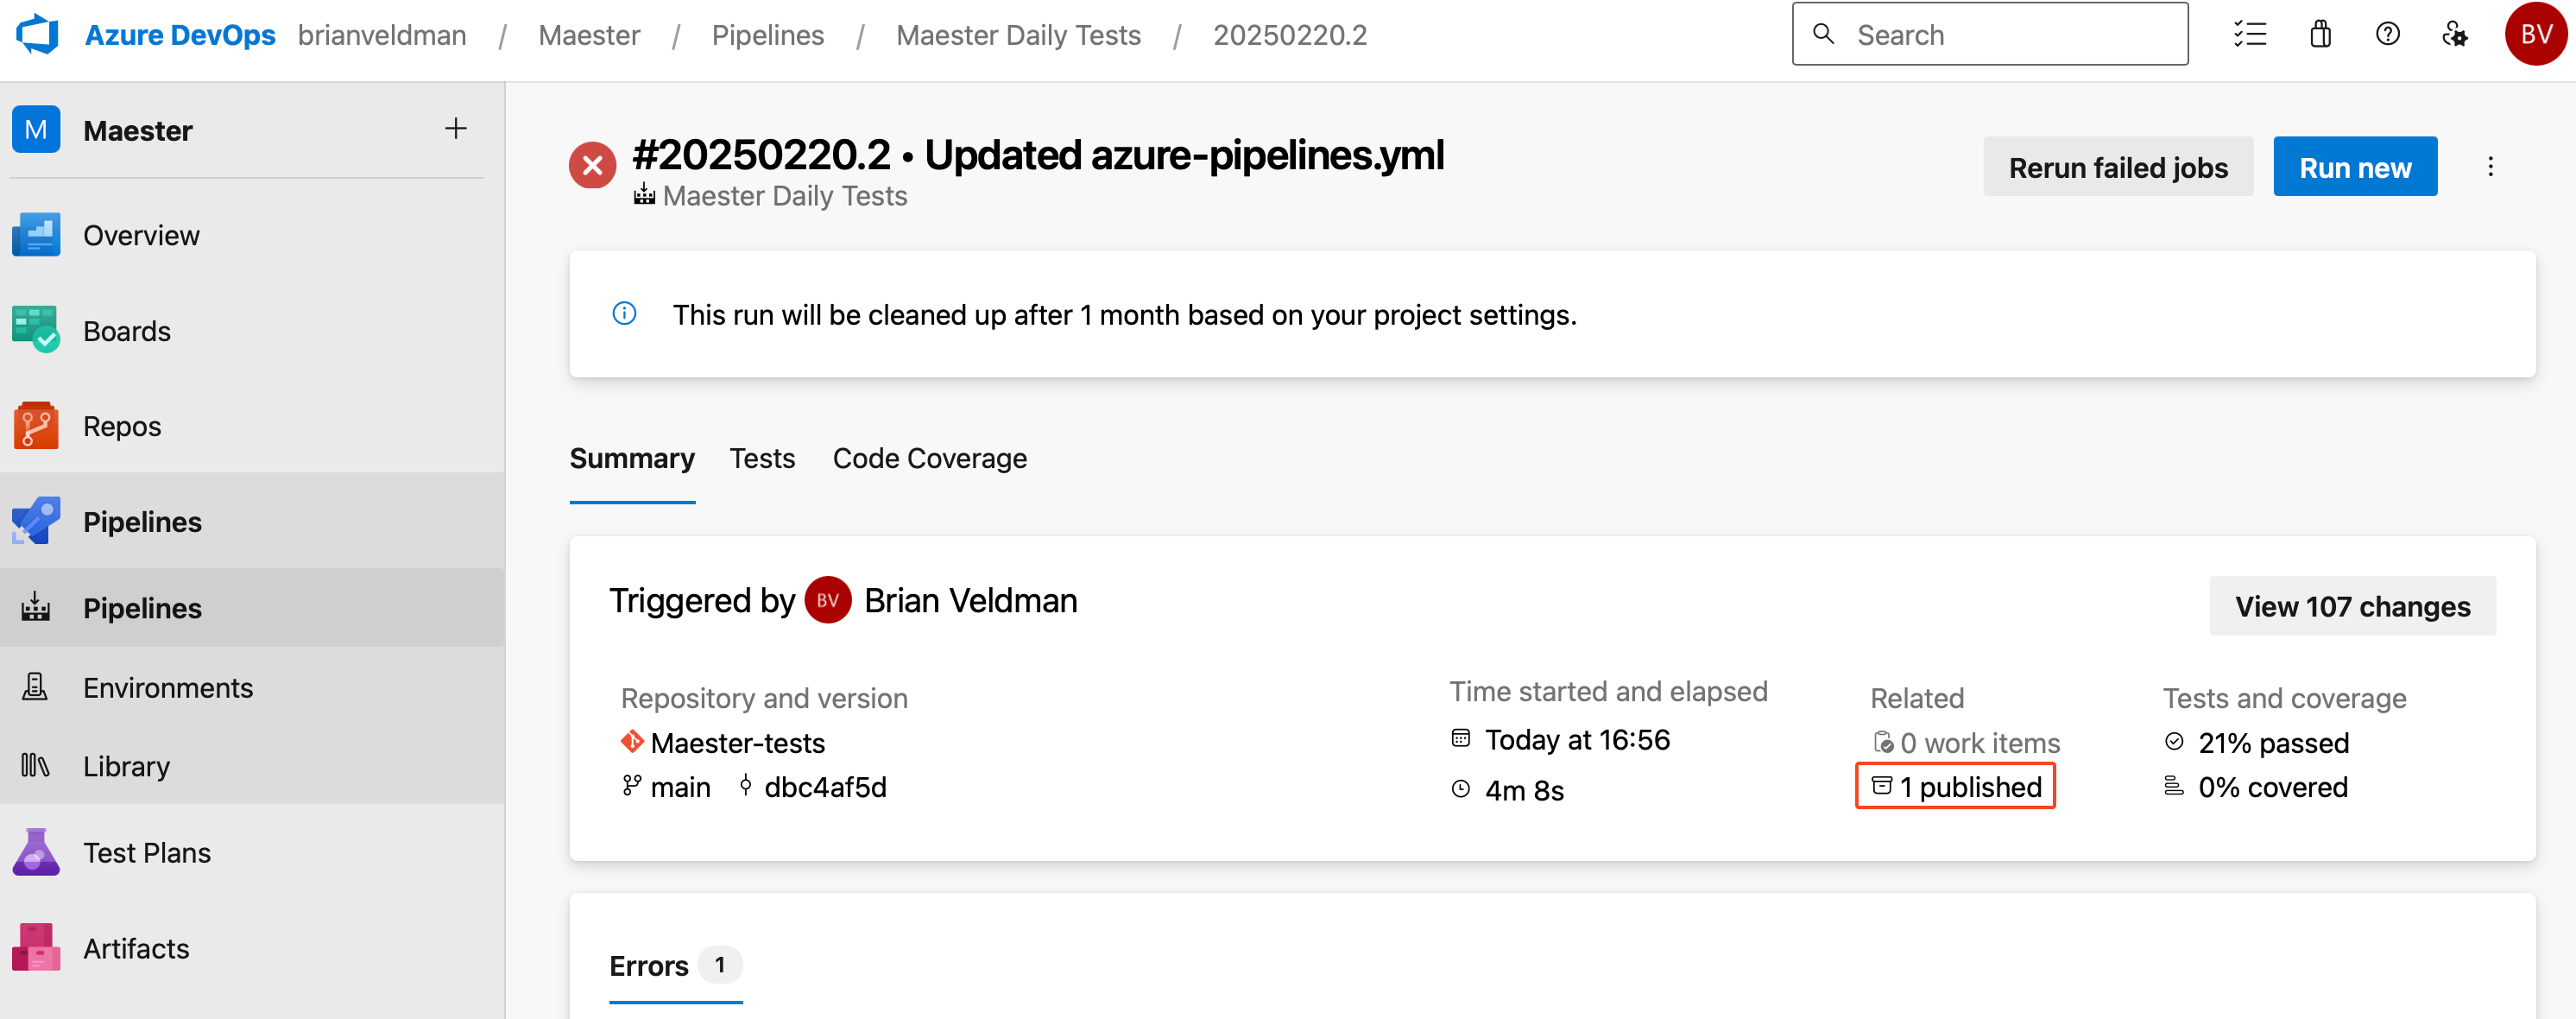
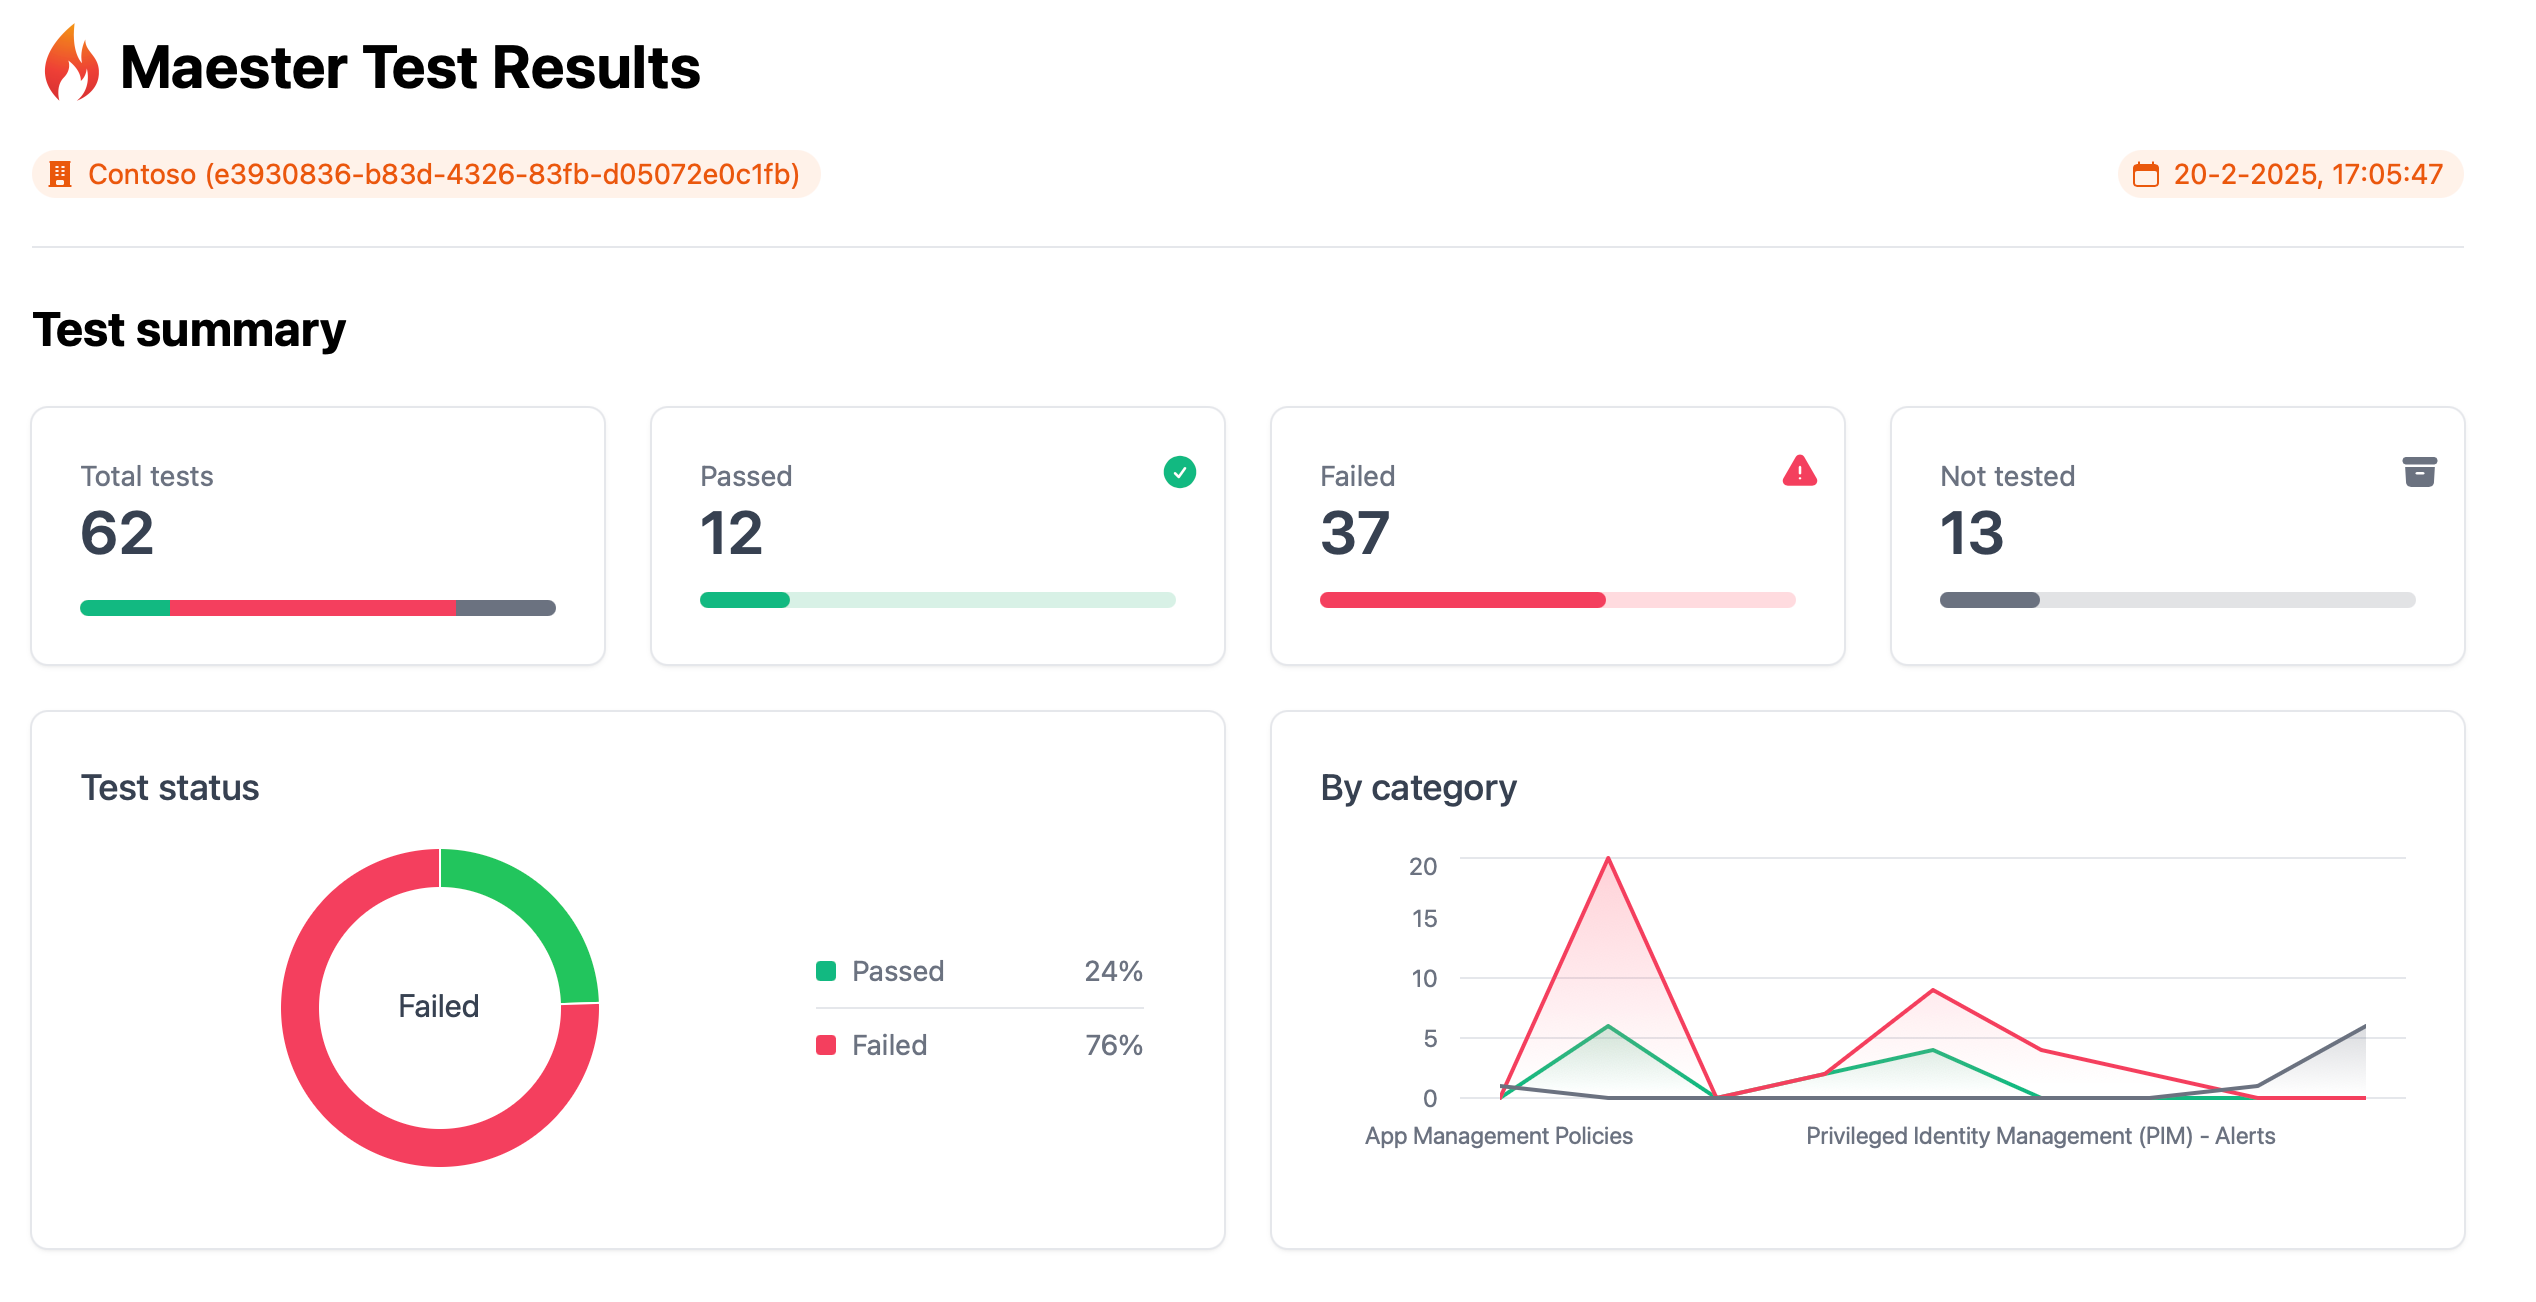
Maester report
The Maester report can be downloaded and viewed by selecting the Published artifact.
Tests view
The Tests tab shows a detailed view of each test, including the test name, duration, and status.

Keeping your Maester tests up to date
The Maester team will add new tests over time. To get the latest updates, just simply redeploy the Terraform Module!
Contributors
- Original author: Brian Veldman | Technology Enthusiast
- Co-author: Merill Fernando | Microsoft Product Manager