Set up Maester Email Alerts
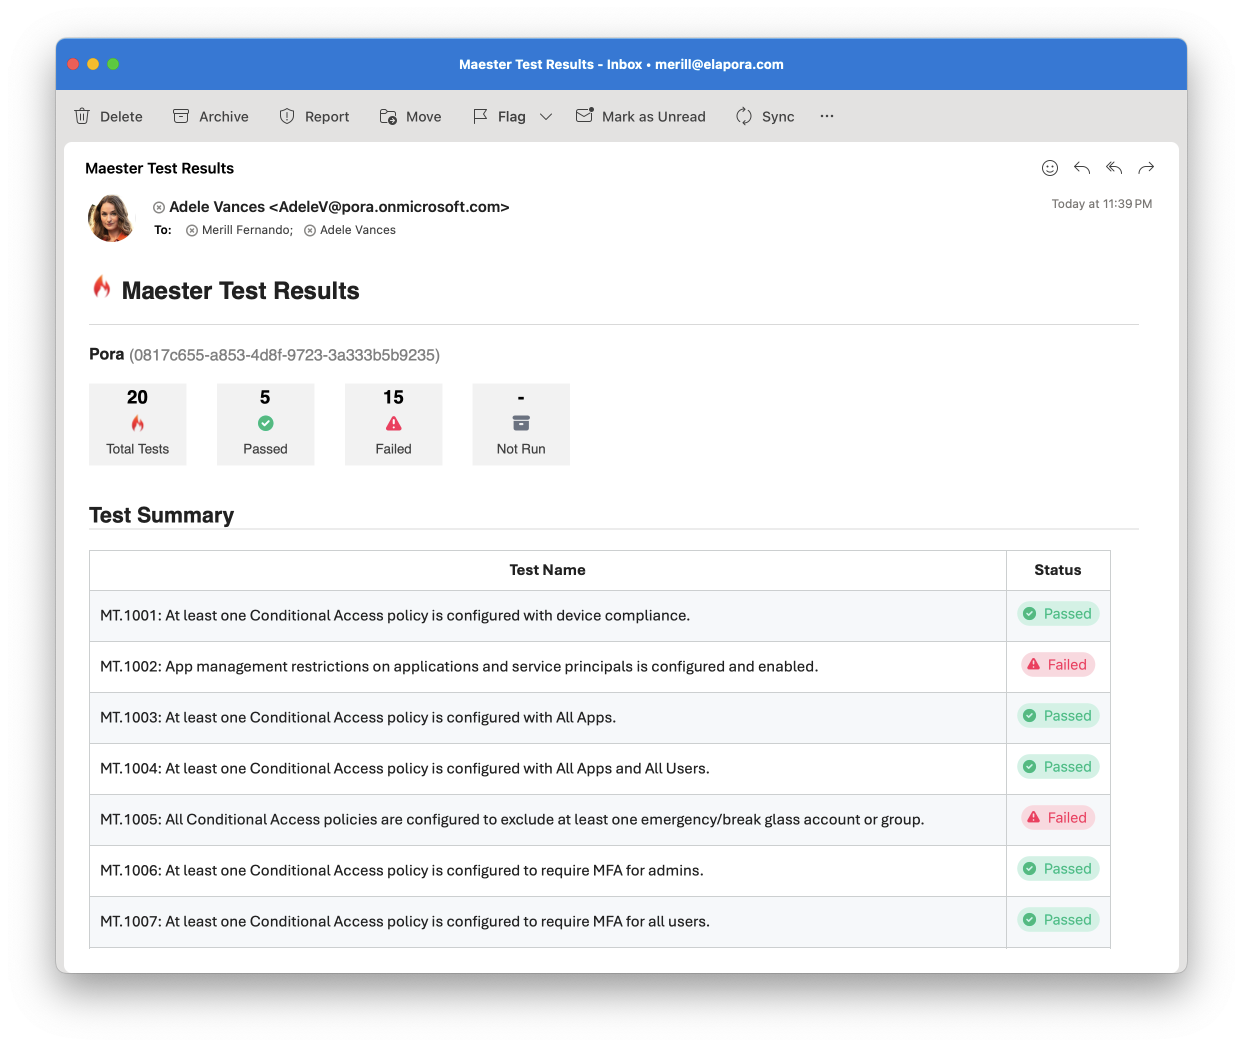
Your Maester monitoring workflow can be configured to send an email summary at the end of each monitoring cycle. This guide will walk you through the steps to set up email alerts in Maester.

Prerequisites
Before you can send email alerts using Exchange Online you need to grant the application access to a mailbox. There's two ways to assign the this permissions:
- Using RBAC for Applications for scoped access (Recommended)
- Using Graph permission in Entra and limiting access to mailbox using Application Access Policy
Using RBAC for Applications
RBAC for Applications is the newest and most secure way to grant least privilege access to applications in Exchange Online. The example below will dynamically grant an app Mail.Send permission for the specific mailbox only.
The application should not be assigned Mail.Send application permission in Entra, see warning below.
Import-Module ExchangeOnlineManagement

# Authenticate to Entra and Exchange Online
Connect-MgGraph -Scopes 'Application.Read.All'
Connect-ExchangeOnline

# Find your Maester service principal. Update filter with the name of your app registration or managed identity
$entraSP = Get-MgServicePrincipal -Filter "DisplayName eq 'Maester'"

# Register Maester service principal in Exchange
New-ServicePrincipal -AppId $entraSP.AppId -ObjectId $entraSP.Id -DisplayName $entraSP.DisplayName

# Find the mailbox you'd like to send from
$mailbox = Get-Mailbox maesterdemo@contoso.onmicrosoft.com
# Or create a new shared mailbox:
# $mailbox = New-Mailbox -Shared -Name "Maester" -PrimarySmtpAddress [email protected]

# Create a RBAC scope to reference the mailbox
New-ManagementScope -Name "rbac_Maester" -RecipientRestrictionFilter "GUID -eq '$($mailbox.GUID)'"

# Assign Mail.Send role limited to only the Maester scope/mailbox
New-ManagementRoleAssignment -App $entraSP.AppId -Role "Application Mail.Send" -CustomResourceScope "rbac_Maester" -Name "Maester Send Mail RBAC"

# Verify access. This should show a line with Mail.Send permission and InScope = True
Test-ServicePrincipalAuthorization $entraSP.AppId -Resource $mailbox

Write-Host "Use '$($mailbox.ExternalDirectoryObjectId)' when calling Invoke-Maester -MailUserId or Send-MtMail -UserId"
Make sure the app has not been granted Mail.Send permissions in Entra. RBAC and Graph permissions live side-by-side. Leaving the Mail.Send application permission could grant the app tenant-wide access to all mailboxes.
If you previously used Graph Permission and optionally Application Access Policy, removing both is important.
Using Graph permissions
This method is no longer recommended, but included for reference. To configure:
- Open the Entra admin center > Identity > Applications > App registrations
- Search for the application you created to run as the
Maester DevOps Account. - Select API permissions > Add a permission
- Select Microsoft Graph > Application permissions
- Search for
Mail.Sendand check the box next to the permission - Select Add permissions
- Select Grant admin consent for [your organization]
- Select Yes to confirm
It is recommended to limit the scope of the Mail.Send permission to only the mailbox that will be used to send the email alerts.
This can be done by configuring an Application Access Policy in Exchange Online. For more information, see Limiting application permissions to specific Exchange Online mailboxes.
Add the email alert step to your workflow
Update your GitHub/Azure DevOps daily monitoring workflow to send the email alert using Send-MtMail after the Maester tests have been run.
Note: A UserId is required when running under an application context. This can be the UserId of any user or mailbox account in the tenant and will be the mailbox from where this message is sent from.
# Get the results of the Maester tests using -PassThru
$results = Invoke-Maester -Path tests/Maester/ {...} -PassThru

# Send the email summary using the results
Send-MtMail $results -Recipient john@contoso.com -UserId <guid>
Adding a link to detailed Maester results in the email
The Send-MtMail cmdlet has a -TestResultsUri parameter that can be used to include a link to the detailed Maester results in the email.
To use this parameter, you need to provide the URL of the Maester results page. Use the appropriate url format based on the CI/CD system you are using.
GitHub
Link: ${{ github.server_url }}/${{ github.repository }}/actions/runs/${{ github.run_id }}
$testResultsUri = "${{ github.server_url }}/${{ github.repository }}/actions/runs/${{ github.run_id }}"
Send-MtMail $results -Recipient $recipients -UserId $userId -TestResultsUri $testResultsUri
Azure DevOps
Link: $(System.CollectionUri)$(System.TeamProject)/_build/results?buildId=$(Build.BuildId)
$testResultsUri = "$(System.CollectionUri)$(System.TeamProject)/_build/results?buildId=$(Build.BuildId)"
Send-MtMail $results -Recipient $recipients -UserId $userId -TestResultsUri $testResultsUri